⚛️Detailed Guide On "State" In React⚛️
This is a complete step-by-step guide on React State

Frontend Dev 🚀 | JavaScript ♥ | ReactJs ♥ | Next JS | Featured Technical Writer✍️
React separates passing data & manipulating data with props and state. In the previous post, I explained how to pass data between components by using
“React props”🤠.
Props are only being used for passing data. They are read-only which means that components receiving data by props are not able to change it. However, in some cases, a component may need to manipulate data and that’s not possible with props.
So React provides another feature for
data manipulationwhich is known as State.
In this article, you will learn what React’s “State” is and how to use it🥳.
What is State?🤔
State is used with React Component Classes to make them dynamic. It enables the component to keep track of changing information in between renders.
More specifically, the
stateof a component is anobjectthat holds information that may change over the lifetime of the component😯.
We can explain the state under 5 pieces:
- ☝️
Stateis a special object that holds dynamic data, which means thatstatecan change over time and anytime based on user actions or certain events. - ✌️State is
private and belongs only to its component where defined, cannot be accessed from outside, but can be passed to child components via props. - 👌
Stateis initialized inside its component’s constructor method. - 🖖When a change in the state is made,
state shouldn’t be modified directly. Instead, state updates should be made with a special method calledsetState( ). - 🖐️State should not be overly-used in order to prevent performance problems.
So these are the points basically explaining what
Stateis.
State v Props💥
You may wonder🧐 how this differs from props? We looked at props in my previous article: React Props. Recall that props are an object which holds information to control the behavior of a component. This sounds very similar to state,
but let's see how they differ:🕵️♀️
- Props are
immutable. Once set they can’t be changed. Stateis observable. It can hold data that may change over time.- Props are set by the
parent component. - State is updated by event handlers
Now let’s see how to use it…👩🦱
Using State in a Component🍁
In the earlier days, state could only be used in class components, but after the introduction of React Hooks, the state now can be used both in class & functional components.😀
We will only cover here the classic usage of state with class components. now can be used both in class & functional components.
We will only cover here the classic usage of state with class components.
State in React js class component💫
Here we will see how to use state in React js class component.
In this example, we will create a counter component, to get the actual count value we need to create a state object we will use the Constructor.
A constructor is nothing but a method that is used to initialize an object state in class😯.
- Let’s say
index.htmlcontains the below statement inside the body tag:
<div id="root"></div>
- Next in the
index.jsfile write the below code:
import React from 'react';
import ReactDOM from 'react-dom/client';
import './index.css';
import App from './App';
import reportWebVitals from './reportWebVitals';

const root = ReactDOM.createRoot(document.getElementById('root'));
root.render(
    <App />

);
reportWebVitals();
- Next, in the
Counter component, write the below code:
import { Component } from "react";

class Counter extends Component{
    constructor(){
        super();
        this.state= {
            counter:0,
        };
    }

    render(){
        return <h3>Count value is : {this.state.counter}</h3>
    }
}
export default Counter;
- Now run the app with the
npm start command, to render the above code on the page.
 This is how we can define the
 state in React js🙂.
Update state in react js🗽
Here we will see how to update state value in React js
We will use the above Counter example, here every time we will click on the button, the counter value gets incremented. As in the above example, the counter value is set to 0, so to update the state of the counter we will use the setState method.
- In the
Counter jsfile write the below code to update the counter state value.
import { Component } from "react";

class Counter extends Component{
    constructor(){
        super();
        this.state= {
            counter:0,
        };
    }

    increment(){
        this.setState({
            counter: this.state.counter +1,
        });
    }

    render(){
        return (
        <div>
        <h1>Count value is : {this.state.counter}</h1>
    <button onClick={()=> this.increment()}>Click</button>
        </div>
        )
    }
}
export default Counter;
- Now start the application using the
npm start command, and then click on the button to increment the value.

This is an example of how we can update the state in React js.
Default state in react js🚀
Here we will see how to set the default state in react js.
For example,
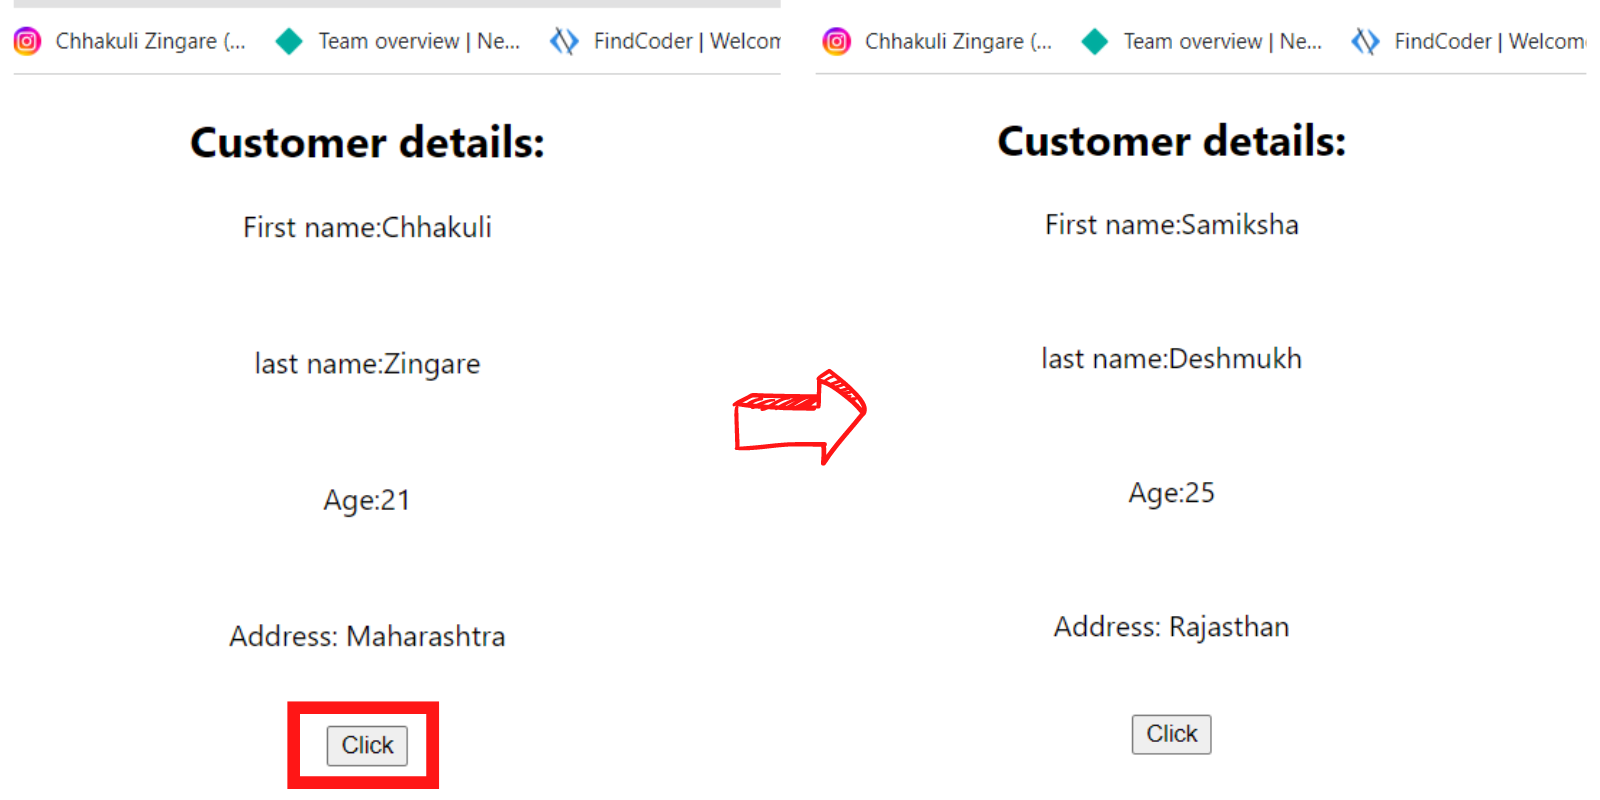
we have a Customer component, in this one set of objects contains the default value and another object contains the updated value. So by default, it will render the default information, once you click on the button it will show you the updated value. Every time we will refresh the page it will show you the Default information.
- Let’s say
index.htmlcontains the below statement inside the body tag:
<div id="root"></div>
- Next in the
index.jsfile write the below code:
import React from 'react';
import ReactDOM from 'react-dom/client';
import './index.css';
import App from './App';
import reportWebVitals from './reportWebVitals';

const root = ReactDOM.createRoot(document.getElementById('root'));
root.render(
    <App />

);
reportWebVitals();
- Next, the
App componentis the default component and contains the below set of code:
import './App.css';

import Customer from './Components/Customer';

function App() {
  return (
    <div className="App">
      <Customer></Customer>

    </div>
  );
}
export default App
- Next, in the
Customer.jsfile write the below code to update the Customer information.
import {Component} from 'react'

 var initialState = {
    firstName: "Chhakuli",
    lastName :"Zingare",
    age      : 21,
    address  : "Maharashtra",
}
var updateValue={
    firstName: "Samiksha",
    lastName:"Deshmukh",
    age:25,
    address:"Rajasthan",
}

class Customer extends Component {
    constructor(){
        super();

this.state = {
        ...initialState
    }
}
    // Set state to default state
    setDefaultState = () => {
        this.setState({
            ...initialState
        });

    }
    //update the state
    updateValue= ()=>{
        this.setState({
            ...updateValue
        })
    }
    render() {
        return(
            <div>
         <h2>Customer details: </h2>
         <p> First name:{this.state.firstName} </p> <br></br>
         <p>last name:{this.state.lastName} </p><br></br>
         <p>Age:{this.state.age}</p><br></br>
         <p>Address: {this.state.address}</p> <br></br>
         <button onClick={()=> this.updateValue()}> Click </button>
            </div>
        );
    }
}

export default Customer;
- Now run the application using the
npm startcommand, you can see the default value is showing, like below, and if youclick on the buttonit will show you the updated value.
- Next click on the
Refresh iconto show you thedefault statevalue.
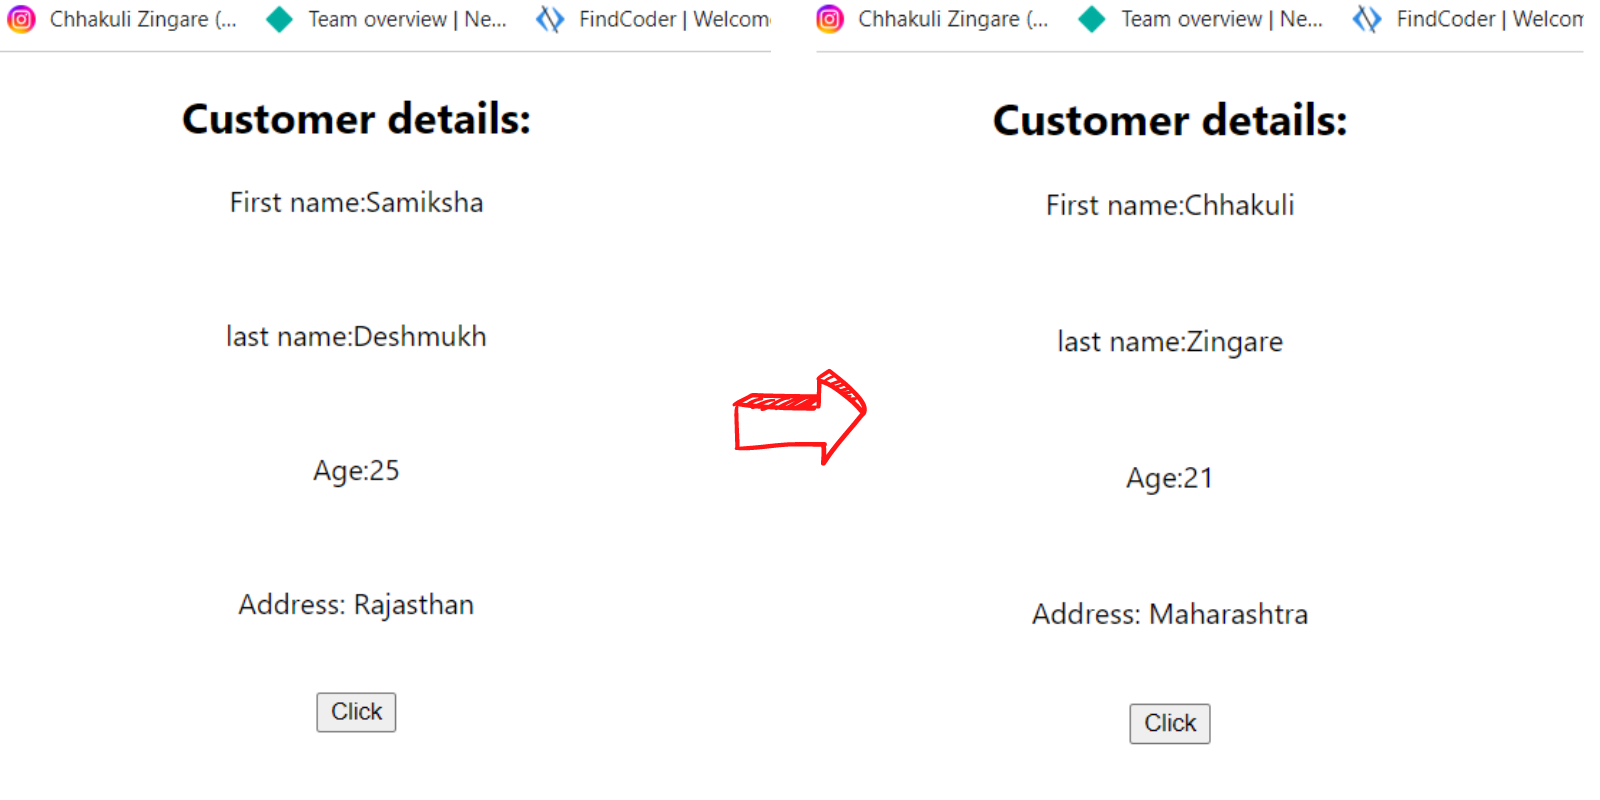
This is an example of the default state value in react js.
Reset state react js🕒
Here we will see how to reset to the initial state in React js
For example, we will reset the component to the initial state in React js.
- Let’s say
index.htmlcontains the below statement inside the body tag:
<div id="root"></div>
- Next in the
index.jsfile write the below code:
import React from 'react';
import ReactDOM from 'react-dom/client';
import './index.css';
import App from './App';
import reportWebVitals from './reportWebVitals';

const root = ReactDOM.createRoot(document.getElementById('root'));
root.render(
    <App />

);
reportWebVitals();
- Next, the
App componentis the default component and contains the below set of code:
import './App.css';

import Customer from './Components/Customer';

function App() {
  return (
    <div className="App">
      <Customer></Customer>

    </div>
  );
}
export default App
- Next, in the
Customer.jsfile write the below code to update and reset the Customer information.
import {Component} from 'react'

 var initialState = {
    firstName: "Chhakuli",
    lastName :"Zingare",
    age      : 21,
    address  : "Maharashtra",
}


class Customer extends Component {
    constructor(){
        super();

this.state = {
        ...initialState
    }
}


//reset to initial state
    resetState = () => {
        this.setState({
            ...initialState
        });
    }
    //update the state
    updateValue= ()=>{
        this.setState({

firstName: "Samiksha" , lastName:"Deshmukh", age:25, address:"Rajasthan"
        })
    }

    render() {
        return(
            <div>
         <h2>Customer details: </h2>
       <p> First name:{this.state.firstName} </p> <br></br>
       <p>last name:{this.state.lastName} </p><br></br>
       <p>Age:{this.state.age}</p><br></br>
       <p>Address: {this.state.address}</p> <br></br>
         <button onClick={()=> this.updateValue()}>Update </button>
         <button onClick={()=> this.resetState()}> Reset </button>
            </div>
        );
    }
}
export default Customer;
- Now run the application using the
npm start command, then click on theupdate buttonto update the state value.

- Next click on the
Reset button, to come to theinitial state, which you can see in the below screenshot.
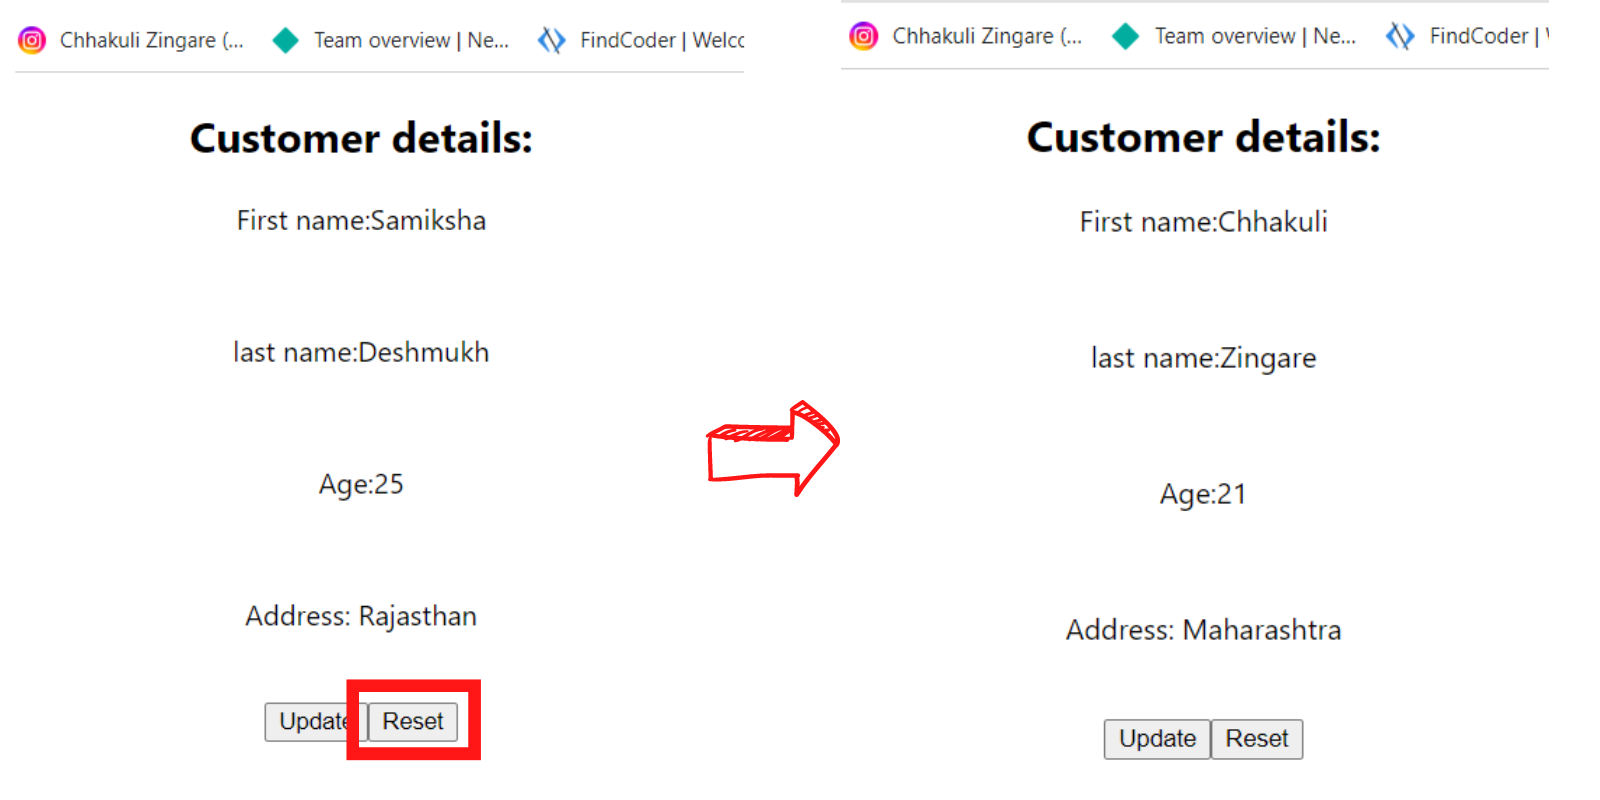
This is an example of a Reset state value in React js.
ahhhhhhh! Chhakuli it was so long🥴......
I know it was😂🤏 but if you have come this long then you are gonna thrive in react journey.
Heyy!!! Be ready for future blogs until then tata by by😁👋


