🖥️How to set up a Node.js web server 🖥️
A beginner-friendly tutorial on building your first Node.js web server


In this article, I will be walking you through how to build a simple web server using the JavaScript runtime environment Node.js.
If you don’t know what Node.js is🙄, or you feel that your understanding of it is still a bit fuzzy, then I highly recommend reading this article first👉:introduction-to-nodejs
So, let’s get started.😉
What is a Node.js web server?🤔
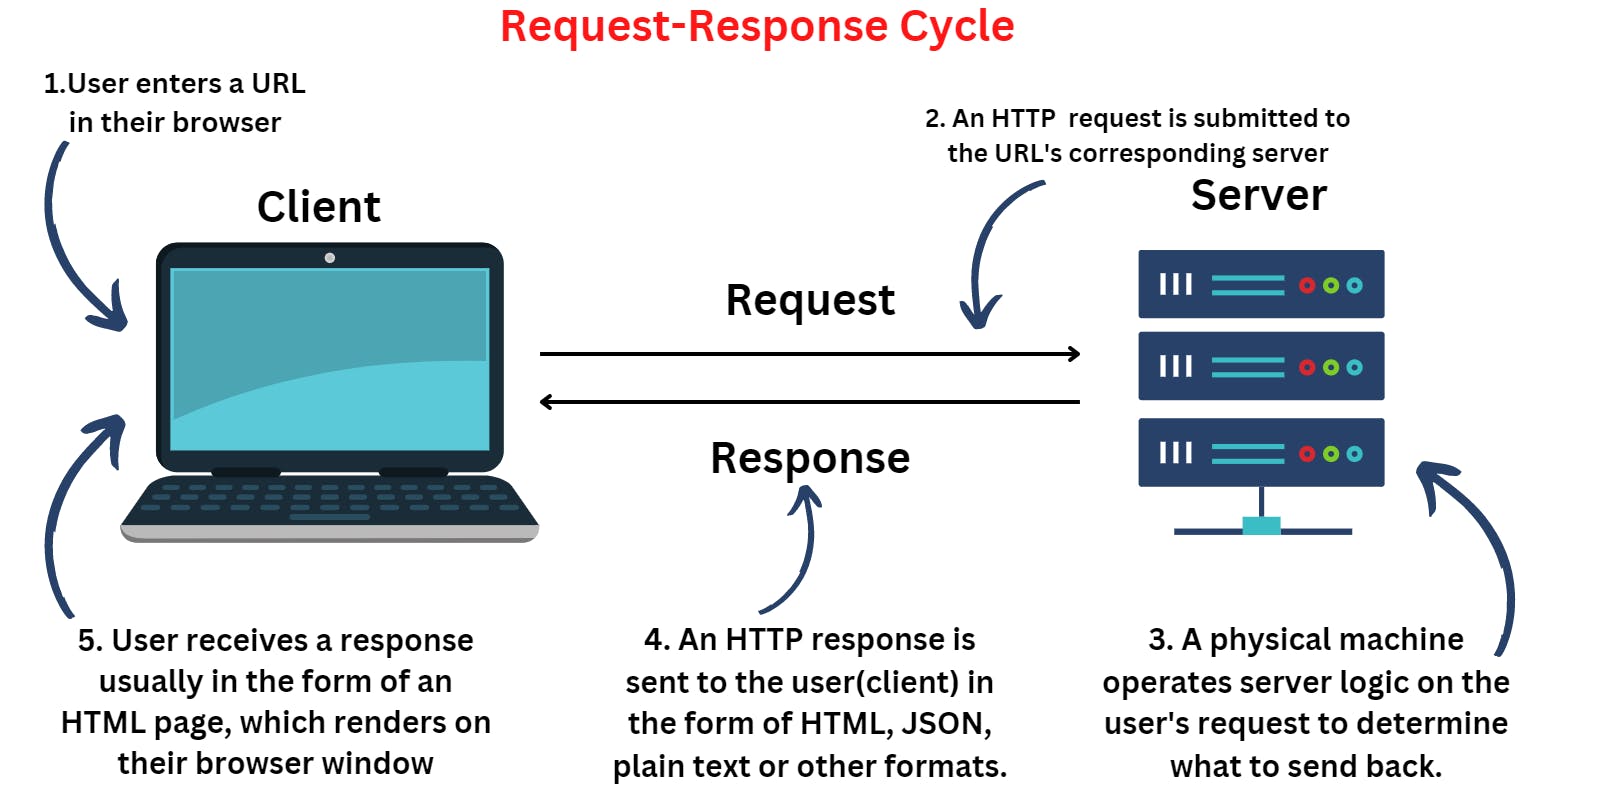
When you view a webpage in your browser, you are making a request to another computer on the internet, which then provides you the webpage as a response.😯 That computer you are talking to via the internet is a web server.
A web server receives HTTP requests from a client👩💻, like your browser, and provides an HTTP response, like an HTML page or JSON from an API.
Hypertext Transfer Protocol (HTTP)
web servers follow Hypertext Transfer Protocol (HTTP), a standardized system globally observed for the viewing of web pages and sending of data over the internet.
One way that a client (your computer) and server communicate is throughHTTP verbs. These verbs indicate what type of request is being made, such as whether the user is trying to load a new web page or updating information on their profile page.
The context of a user’s interaction with an application is an important part of the request-response cycle♻️.
Here are the two most widely used HTTP methods you’ll encounter:
- GET⬅️—This method requests information from a server. Typically, a server responds with content that you can view back on your browser
(such as by clicking a link to see the home page of a site). - POST➡️—This method sends information to the server. A server may respond with an HTML page or redirect you to another page in the application after processing your data (such as filling out and submitting a sign-up form).
How to Build Node.js web server🤫
To build a node.js server, use the built-in HTTP module.
The HTTP module provides a createServer() function that takes a callback function and creates a server. You can also use the express framework to create a server in which you need to use the app.listen() function which will create a server.
Let’s start by creating a server that returns plain text to the user.
This will cover the key concepts required to set up a server, which will provide the foundation necessary to return more complex data formats like JSON.
Step 1: Create a project folder.
☝️First, we need to set up an accessible coding environment to do our exercises.
- In the terminal, create a folder called first-server:
- If you open up your terminal, you can create a new directory — which in this case I’ve decided to name
“first-server”— using the command 👇
mkdir first-server
Okay👍, now go into that folder and open that folder in your editor, and in my case, it is
code.Inside the
root folder, make one file called server.js.Now, let’s add a new JavaScript file to this directory so that we can write some code😉. I’m going to name my file
“server.js”.
Alright, now let’s get coding.🤠**
When you install Node.js, it comes with quite a few JavaScript modules that we can use to our advantage. If you would like to learn more about what modules are available to you through Node.js, or how to use a specific module, you can check out my blog👉
Step 2: Write the server.js file.
In this case, we’re going to be using the HTTP module that Node.js has built for us, and we can access it using the built-in require function by adding the following line of code to the top of our JavaScript file:
const http = require("http")
Then, we used its method createServer. It takes an argument as a req and res. When the browser hits the server, then in response, we will send plain text.
// server.js

const http = require('http');

const server = http.createServer(function(req, res) {
    res.writeHead(200, { "Content-type": "text/plain" });
    res.end("Hello world!");
});

server.listen(3000);
Step 3: Run the node.js server.
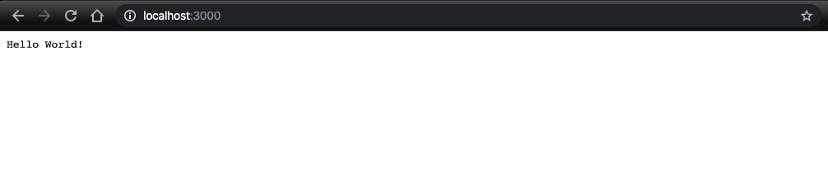
Now, let’s head back to our terminal and run this file with Node.js via the node server.js command — double check that your “present working directory” is “first-server”.
Then head over to your browser and navigate to localhost:3000 — or whichever port you specified your server to run on — and this is what you should see:🤓
If you’ve made it this far, congratulations!🥳 You’ve successfully set up a web server using Node.js 🥂🙂
Summary🙆♀️
The Node.js framework can be used to develop web servers using the ‘http’ module. The application can be made to listen on a particular port and send a response to the client whenever a request is made to the application.
This is soo far soo good....😍
See you in the next blog until then 🙋♀️
keep Reading!!!!!🙏